Examination of the knee video
Watch now
A short video demonstrating how to examine the knee joint.
Look
- From the end of the couch and with the patient’s legs straight, observe the knees, comparing one with the other for symmetry and alignment.
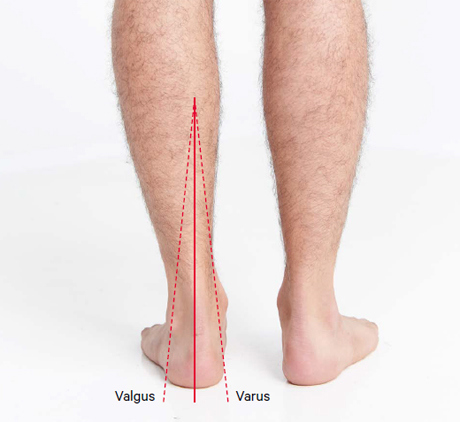
- Is the posture of the knee normal? Look for valgus deformity – where the leg below the knee is deviated laterally (knock-kneed) – and for varus deformity – where the leg below the knee is deviated medially (bow-legged).
- Check for a knee flexion deformity (distinguishing this from hip flexion deformity by examining hip movements as above).
- Check for muscle wasting of the quadriceps or scars.
- Look for redness suggesting inflammation or infection.
- Look for obvious swelling.
- Check for a rash suggesting psoriasis (usually on the extensor surface of the knee).
Feel
- Using the back of your hand, feel the skin temperature, starting with the mid-thigh and comparing it to the temperature over the knee. Compare one knee to the other.
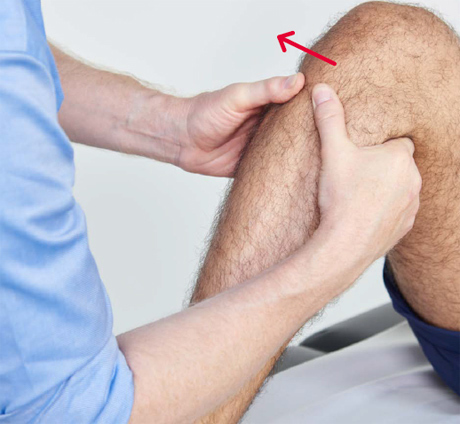
- Palpate for tenderness along the borders of the patella.
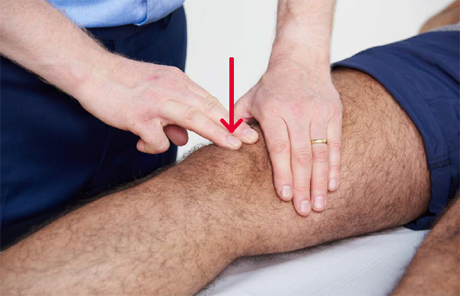
- With the knee flexed to 90°, palpate for tenderness and swelling along the joint line from the femoral condyles to the inferior pole of the patella, then down the inferior patella tendon to the tibial tuberosity.
- Feel behind the knee for a popliteal (Baker’s) cyst.
- Assess for an effusion by performing either a sweep/bulge test or a patellar tap.

Move
- Ask the patient to flex the knee as far as possible to assess active movement. Making sure the patient is fully relaxed, assess passive movement. This is done by placing one hand on the knee (feeling for crepitus) and flexing the knee as far as possible, noting the range of movement. Assess full flexion and extension of the knees, comparing one to the other.
- With the knee flexed to 90°, check the stability of the knee ligaments. Look initially from the side of the knee, checking for a posterior sag or stepback of the tibia, suggesting posterior cruciate ligament damage.
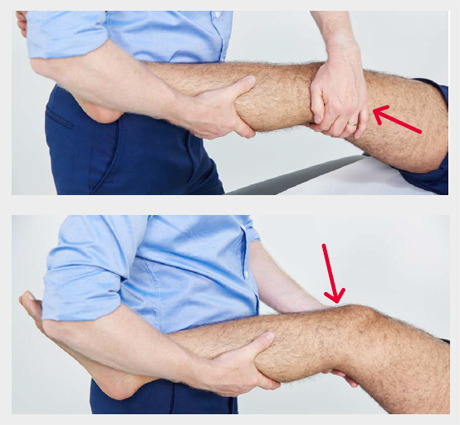
- Perform an anterior draw test. Place both hands round the upper tibia, with your thumbs over the tibial tuberosity and index fingers tucked under the hamstrings to make sure these are relaxed. Stabilise the lower tibia with your forearm and gently pull the upper tibia forward (see image below). In a relaxed, normal patient there is normally a small degree of movement. More significant movement suggests anterior cruciate ligament laxity.
- Assess medial and lateral collateral ligament stability by flexing the knee to 15° and alternately stressing the joint line on each side. Place one hand on the opposite side of the joint line to that which you are testing and apply force to the lower tibia (see image below). This may be done with the leg on the couch or with the lower tibia supported on the side of the examiners hip.
Function
- Ask the patient to stand and then walk a few steps, looking again for a varus or valgus deformity (see image below).